

Finally! Finally I bring you to one of the most treasured recipes you will ever learn. It's simple, doesn't require many ingredients and it is a staple in any Lebanese home. Labneh adorns the dinner table most every night. Used as a dip, used in cooking and even as a main ingredient in sandwiches. The beauty of labneh is that it is thick and can withstand being slathered on a piece of pita bread without any problem. It can be the star of a dish or fall into the background as a base for pizza or soups.
For as long as I can remember my parents ALWAYS had labneh at home. I recall my mom asking friends or neighbors for "rowbe" which is the labneh/yogurt start. If your "rowbe" turns sour you need a new one to get your yogurt going. The beauty of living in an area surrounded by Lebanese Americans was that someone always had your back and your "rowbe" starter. At that time, I had no idea what it was, why it was needed or that labneh was something special that our families made. Until that is I moved 3,000 miles away, then it became important, it became essential for me to know how to make this magic for myself.
I was 22 years old when I moved to Portland and while it was difficult to leave my family, I saw it as an adventure and a place to start something on my own. I quickly realized that I ate really well when my parents cooked for me all the time! I also realized that if I wanted all the good food I grew up on, I would have to learn. I called (and still call) my parents everyday (my mom I talk to 3-4 times a day), my conversations quickly became about how to make this and how to make that, how much of this spice to I add and how long do I bake something in the oven. My parents did everything by memory, barely by measurement and everything was done when it was slightly reddish on top! But labneh was where I started my journey trying to replicate my parents cooking. I needed to have the same tart, tangy, smooth and delicious yogurt I grew up on. The good stuff that I slather on my manouche and eat with olives and cucumbers. I needed to learn the science behind it and be sure my kids ate this amazing healthy yogurt.
So after many phone calls, measurements, temperatures and figuring out to drain 2 gallons of yogurt into a cheesecloth bag I was on my way! I learned the ins and outs and began making labneh regularly. We are rarely without it at our house and use it for everything. I even began taking the labneh and adding homemade jams to it to make our own flavored yogurts (my kids won't eat store bought...ever!) I am so happy they love it just as much as I do and did as a kid. I promise that if you start making your own, you won't be able to stop. I've laid everything out for you step by step! With a little bit of time and patience, you'll have the most AMAZING yogurt of your life.

The Process
STEP 1:
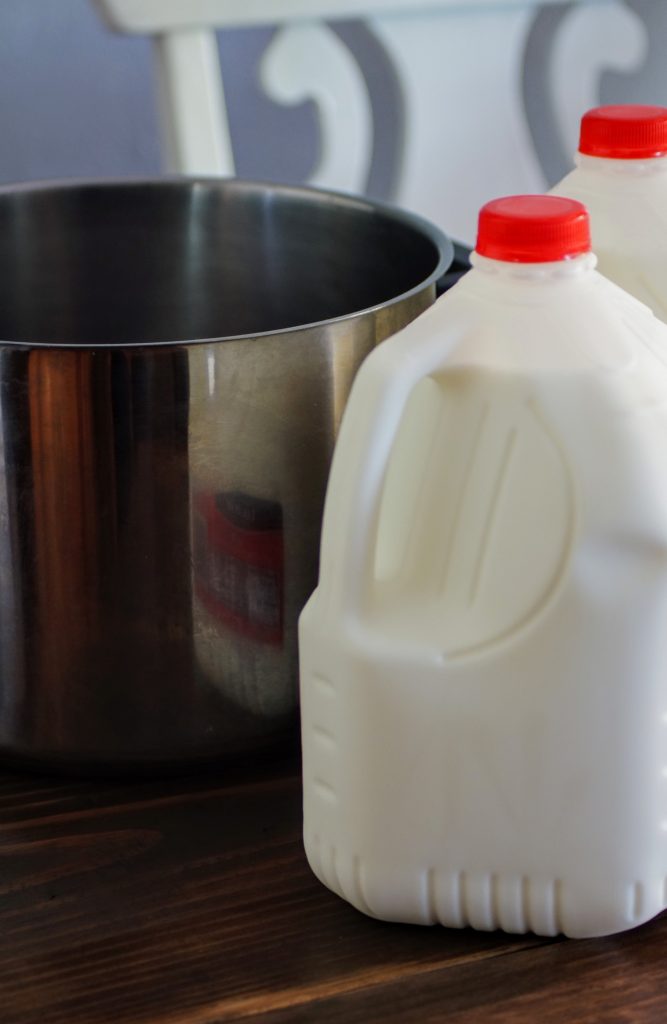
You'll want to start with one or two gallons of milk. I use two but you may want to start with one gallon for your first attempt or go for two if you're feeling adventurous! Whole milk is preferred but 2% will also work, anything less than 2% will probably not thicken up as it should.
STEP 2:
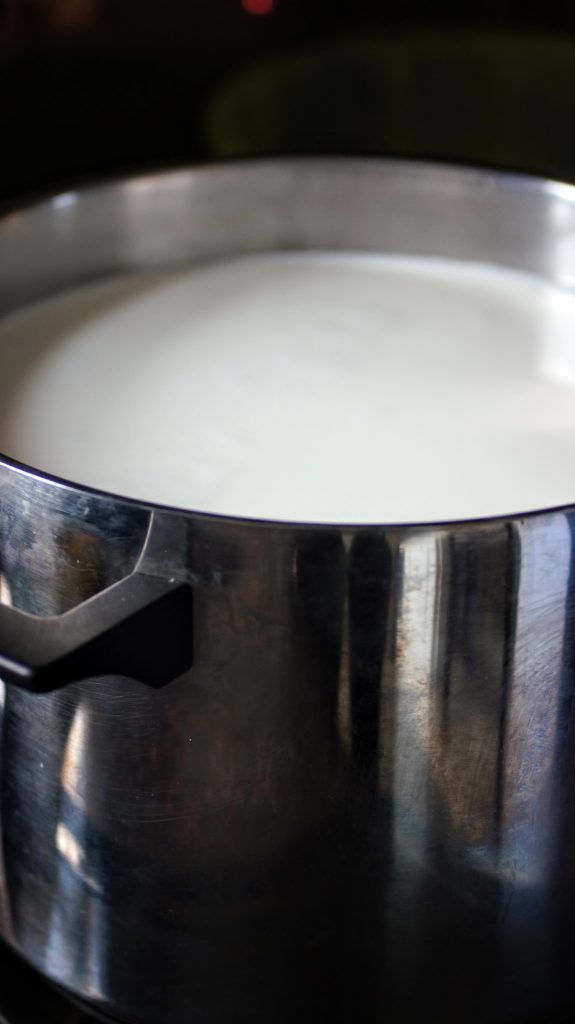
Pour milk into a large heavy bottomed pot and set on burner at medium heat. You'll want to stir every 5ish minutes to make sure the milk doesn't stick to the bottom.
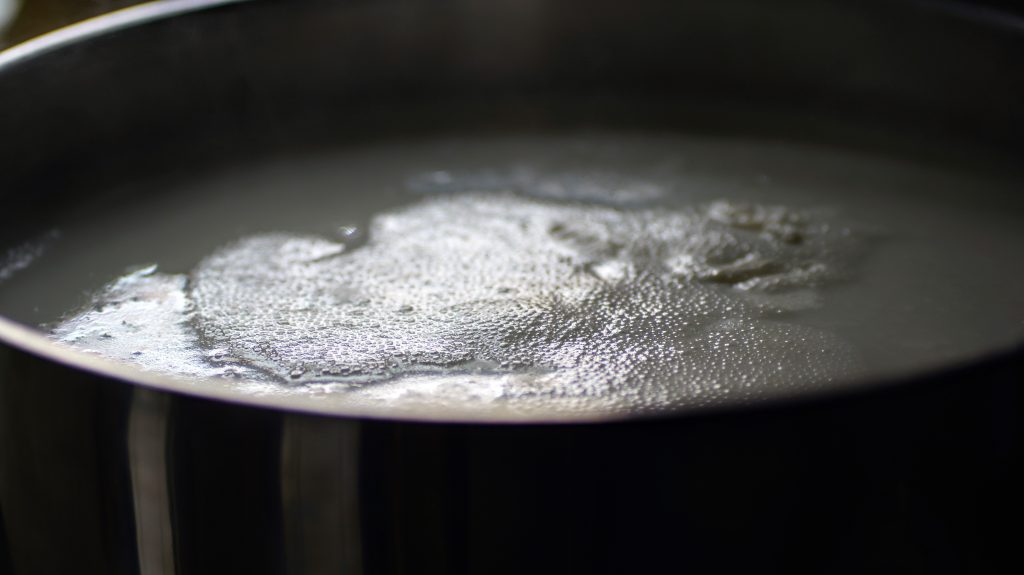
STEP 3:
Bring milk to a boil. You DO NOT want to let it boil over (believe me, I have done is many, many times it is awful to clean up!) Keep monitoring, stiring and making sure the milk doesn't stick to the bottom. You'll start to see some bubble forming at the top. Timing for it to boil can vary depending on your stovetop. I'd say anywhere from 15-20 minutes (slightly more with 2 gallons of milk). Remove from heat.
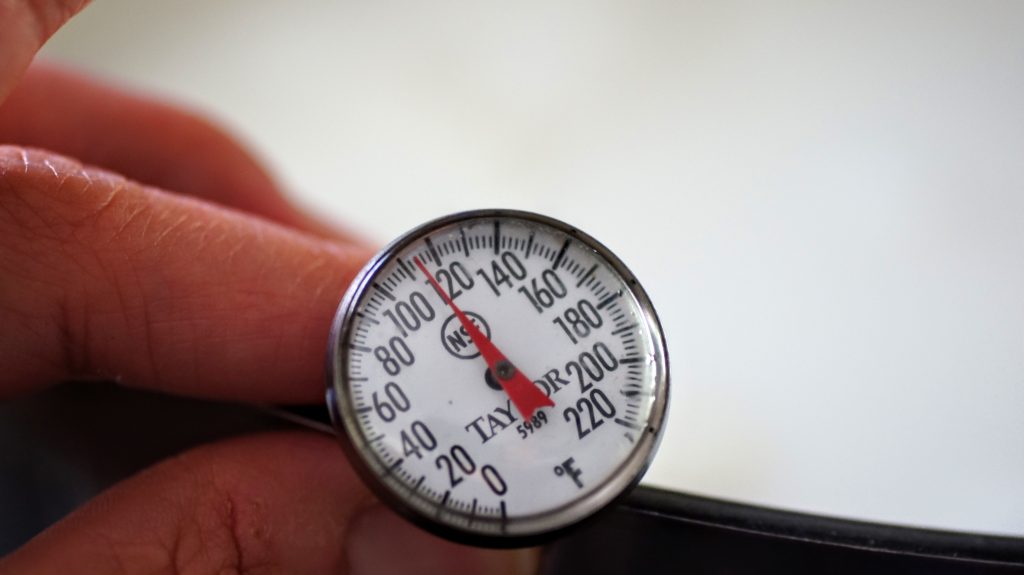
STEP 4:
This is the waiting game portion. You want to get your boiled milk to cool down to 110 degrees Fahrenheit. It can take anywhere from 30 minutes to an hour (again, longer with more milk). This is also a time where timing is key. I like making labneh in the evening but not too late where you have to wait too long and it gets really late (I have also done this many, many times). If you're slightly under temperature it's okay, things should still work out. You want to get as close to 110 as you can. Remember above when I told you I got zero times from my parents? Yeah, my dad's method was to place your finger in there and it's ready when you can comfortably leave it in there without jolting. Ha! Thank goodness for thermometers!
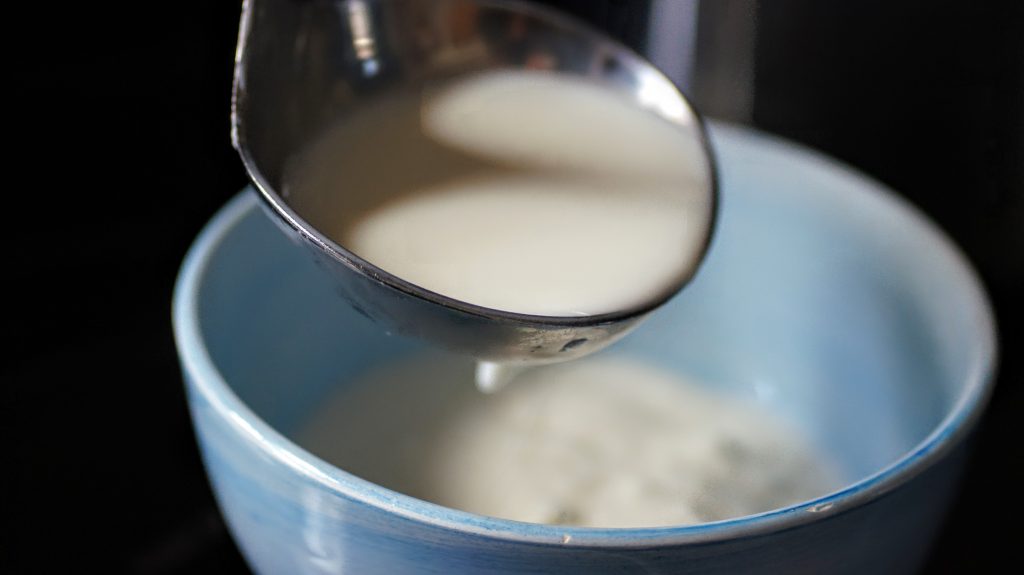
STEP 5:
You'll need your rowbe or yogurt starter. You can either get a start from a friend or purchase a small container of PLAIN, WHOLE MILK yogurt from the store. After this you will have your own start and won't need to buy it anymore. Place your rowbe/yogurt start into a small bowl and ladle some of the warm milk into the bowl. This tempers the yogurt so it's not shocked by the hot milk all at once. Stir slightly then pour into the large pot and stir.
STEP 6:
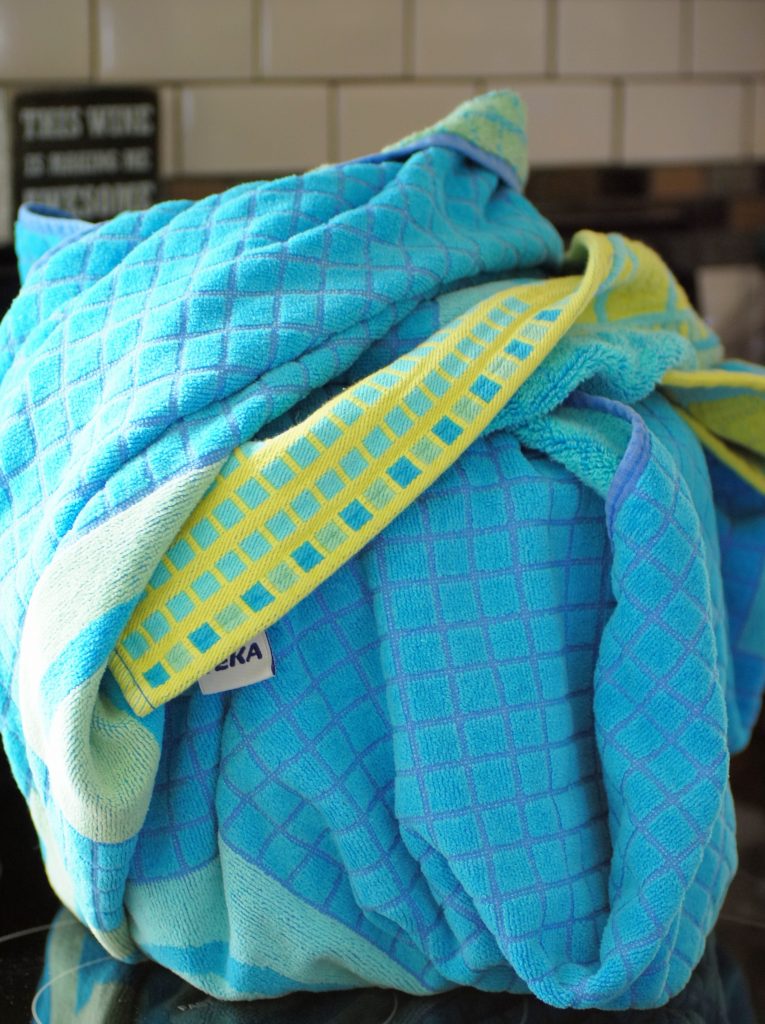
Crazy Lebanese woman coming at ya! So I know some people use yogurt makers and all that fancy stuff but me...I use a nice thick beach towel!!! Find a CLEAN, thick towel or blanket big enough to wrap around your pot. Wrap it nice and tight and leave out overnight (or 8-10 hours) in a warm place. I'll often leave on my stovetop (turned off of course) or on the counter above my dishwasher.
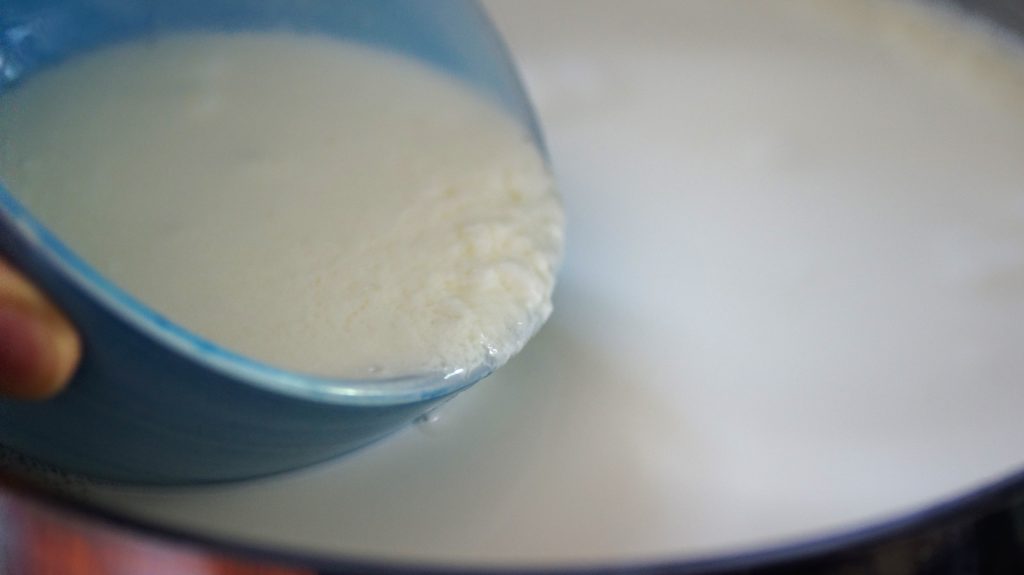
STEP 7:
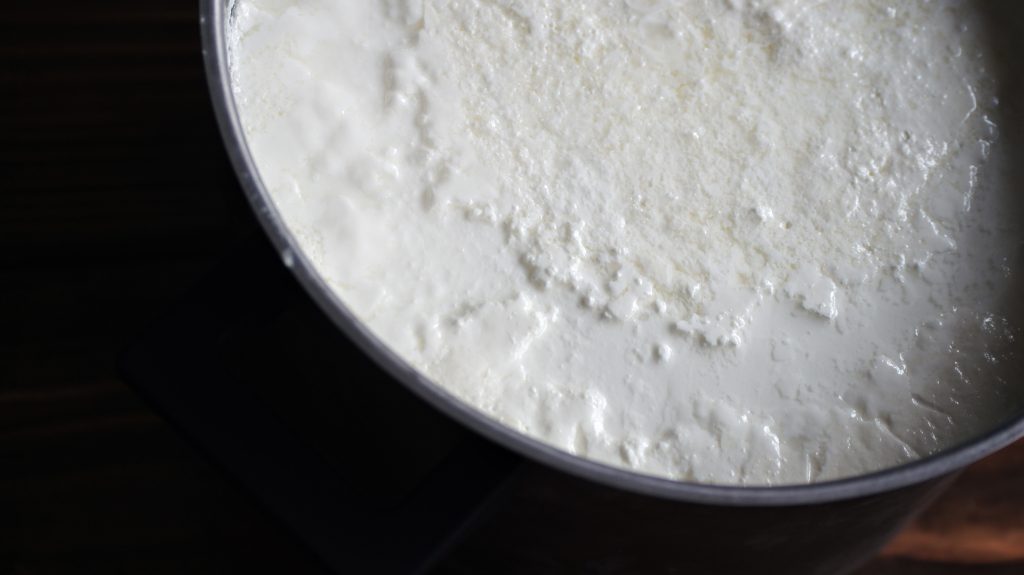
The next morning or after your time has passed, you can open the lid of your pot and your yogurt should look something like this. Curdled with some liquid. This my friends is pure YOGURT! Now, you can stop right here and enjoy this lovely yogurt as is if you'd like. I definitely fill up a jar so I can use in baked goods, on some Lebanese savory dishes like Kousa. But for now, place the large pot in your refrigerator for 8-10 hours until it cools down.
STEP 8:
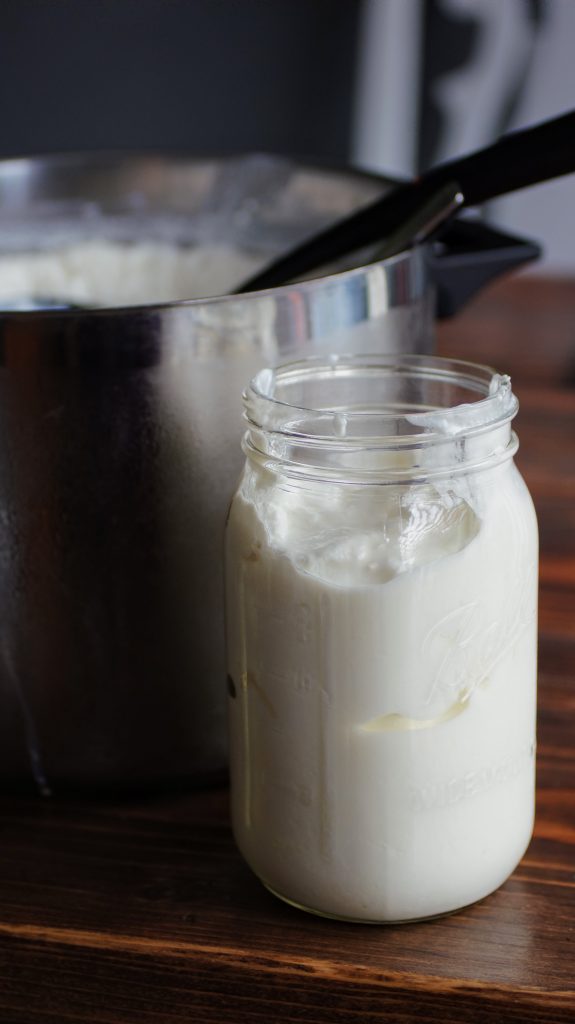
The next day, take out your large pot of yogurt and remove a small portion (about 4 ounces) and place in a sealed container, leaving little to no air between the yogurt and lid. The less amount of air, the longer your yogurt start will last. I have had some in my fridge for 4-6 weeks without any problems. At this time, you'll also want to take out any yogurt you'll want to use as plain yogurt in a jar. After you remove what you want, add in about 2 teaspoon of salt to the remaining yogurt in the pot. The next step is to strain to make labneh.
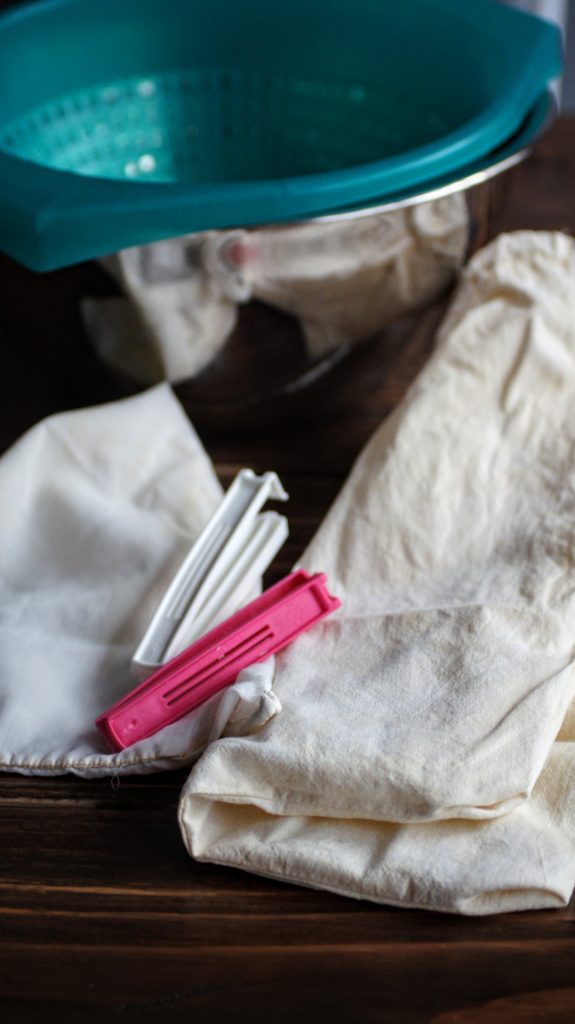
STEP 9:
The most important step in making labneh, taking your plain yogurt and straining it. The thing that makes labneh different than Greek yogurt is the length of time the yogurt strains. Labneh is often referred to as a cheese rather than yogurt due to it's thick consistency. I use cheesecloth bags (the thinner the better), I've heart nutbags work very well too. I love these Ikea Clips and you can even get them on Amazon if you aren't near an Ikea. They cinch the bags perfectly, but you can use anything that works for you. I also have a colander and place a large bowl underneath to catch the drained whey. Unfortunately, I couldn't snap a shot of the next step. With very steady hands, I place the bag against the pot and lift and pour into the bags. You can of course do this anyway that works for you, but the gist is to pour the yogurt into the bag(s) and quickly clip and place in colander. The whey will drain leaving you with delicious thick labneh! I generally leave draining for 2-3 days. The longer you leave, the thicker the labneh will be. You'll want to check and make sure your whey isn't too full, if so, draining and leave labneh to finish.
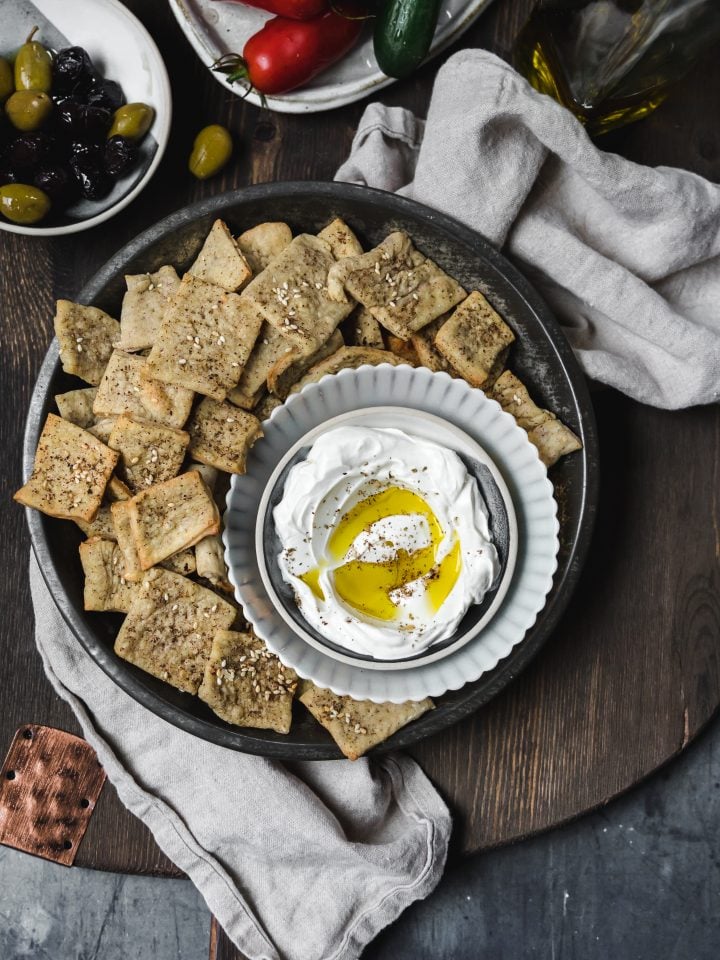
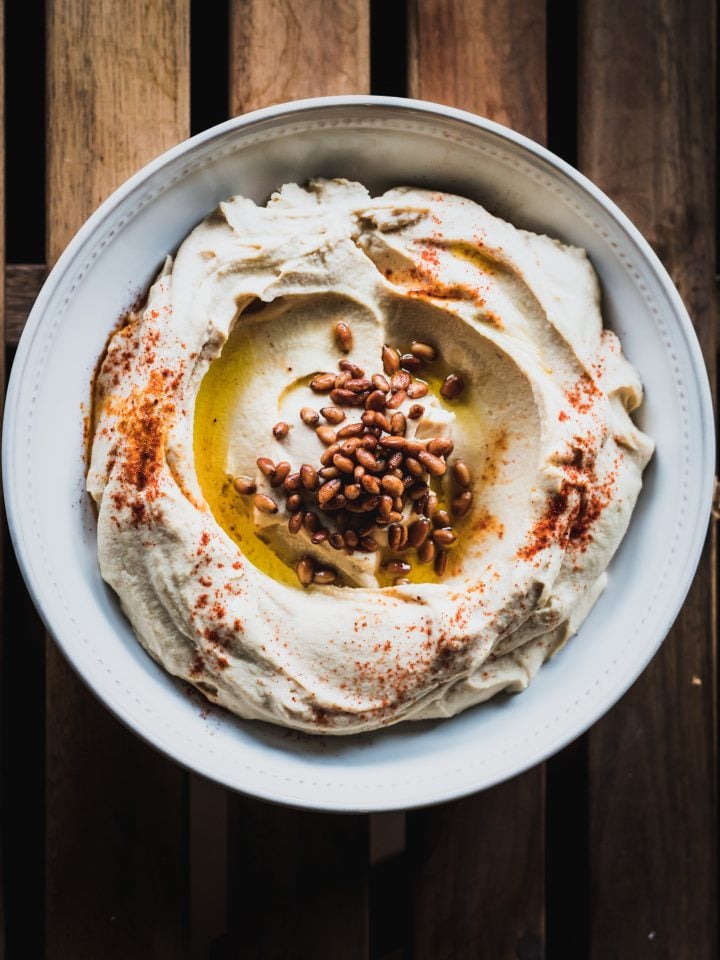
STEP 10:
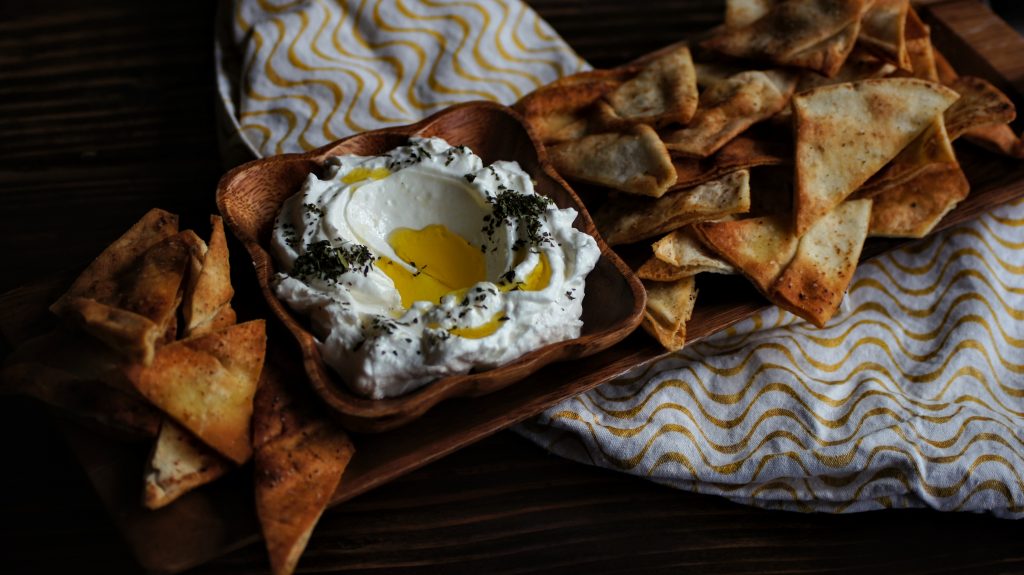
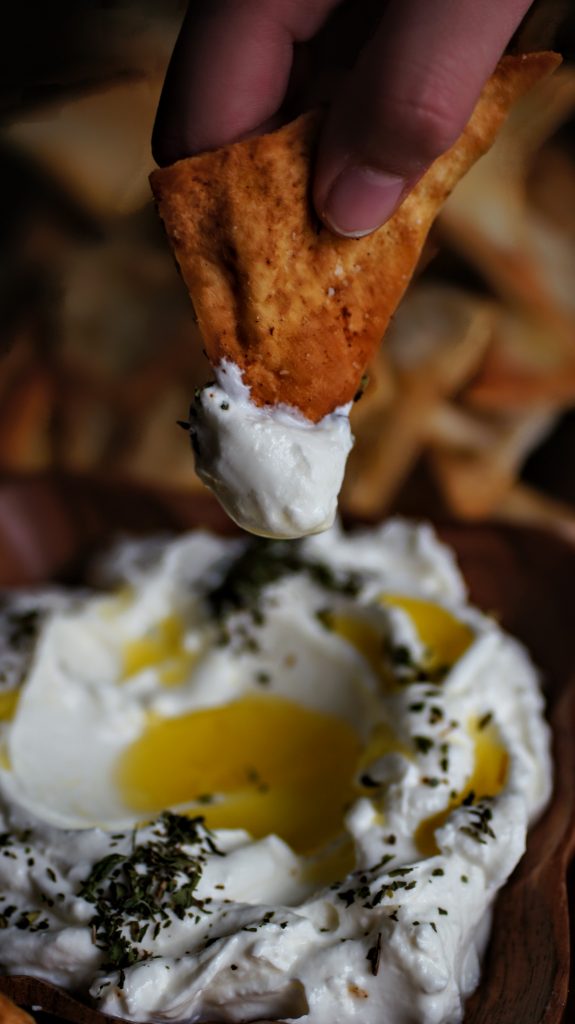
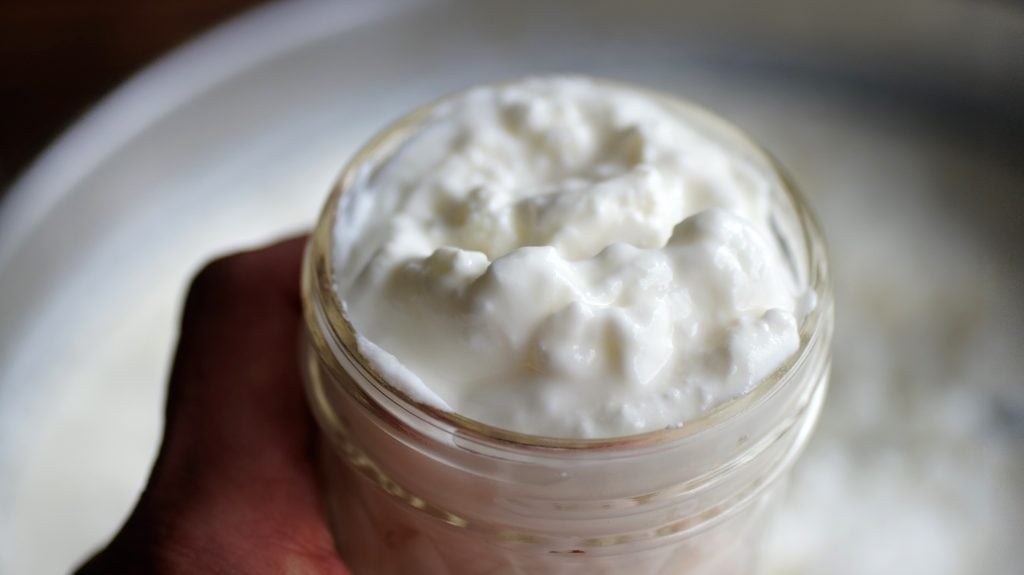
Final step...enjoy! Remove your labneh from your bags and store into containers. Traditionally we set out labneh in a bowl, drizzle a boat load of olive oil and even sprinkle with some dried mint or whatever you'd like. Enjoy!

As always, I love seeing your creations. Be sure to tag me on Instagram @CosettesKitchen or post on my Facebook Page.
Print
Labneh
- Prep Time: 1 hour
- Cook Time: 45 minutes
- Total Time: 1 hour 45 minutes
- Category: Appetizer
- Cuisine: Lebanese
Ingredients
- 1-2 gallons whole milk (can use 2% )
- 4 ounce plain whole milk yogurt
- 2 tsp kosher salt
Instructions
- Pour gallon(s) of milk into large heavy-bottomed pot and heat on medium heat until milk comes to a low boil. Be sure to stir to ensure the milk doesn't stick to bottom.
- Remove milk from heat once it comes to a low boil and let cool down to 110 degrees Fahrenheit.
- Once milk has cooled down, place your 4oz yogurt start in a small bowl and ladle a small amount of hot milk into bowl to temper. Pour the bowl of yogurt start + ladled milk into large pot.
- Cover and wrap pot with large clean towel or blanket in a warm place for 8-10 hours.
- After 8-10 hours, remove towel/blanket and place pot in refrigerator for another 8-10 hours.
- Ladle 4-6 ounces of yogurt into a small jar, leaving as little air as possible between the yogurt and lid. You may also ladle out any additional yogurt you'd like to keep at this step.
- Next, add in your salt and mix.
- Prep your a colander, bowl, cheesecloth bags and clips.
- Pour yogurt into bags, clip and place in colander. Leave in refrigerator to drain for 2-3 days, depending on your thickness liking. Be sure to check and drain any excess whey to allow labneh to continue to drain.
- Remove from bags and enjoy!
Notes
Labneh should be stored in the refrigerator in a sealed container. It will generally last for at least a month.
If you'd like to make flavored yogurt, add in some jam to your labneh and enjoy!

Vicki B. says
I was taught how to make Labneh by my friend's Lebanese mother. I was told that I wasn't allowed to write anything down until I had fully perfected the recipe because generations before me had made it without writing anything down and so could I. 🙂
I truly laughed out loud reading your article because your description of putting your finger into the bowl of hot milk until you could comfortably hold it there without jerking away... is exactly how I was taught. Good to know that is equivalent to 110 degrees. 🙂
Thanks for sharing this recipe and your story!
Cosette's Kitchen says
Hahahaha! OMG, I love this so much! So many recipes are passed down that way. It takes a village to record them accurately so folks like you and me can enjoy them later. I hope you have the chance to make this and yes - finger in hot milk is about 110 degrees! Hahahaha!
xoxo,
Cosette
Z. Firestone says
So I am originally from Israel, we have it there as well, BUT, when I moved to Canada, the lady across the street was from Lebanon, wonderful lady....and she would always make this for me. She showed me how ( I liked it very sour) and she always told me, "it all depends on how much water the cow drank".....and "hang the bag over the sink or somewhere where it's quiet...the Lebneh does not like loud noises" .... loll... Anyway... Cheers to you! This method is the exact same way I make it.
Cosette's Kitchen says
Ohhhhhh, that is such an interesting bit of information!! I have never heard that but love it! I love to use Danon plain whole milk yogurt as my start if mine goes bad - seems to give me the best flavor and consistency for my labneh. So glad you enjoy making it too!!!
xoxo,
Cosette
John de Miguel says
Hi Cosette, what are your thoughts on making labneh directly from yogurt?
Cosette's Kitchen says
You can absolutely purchase store ready yogurt and simply strain to make labneh. Be sure to buy plain yogurt, not Greek. It does make a difference since Greek is already processed. The bonus to homemade is larger batches and much cheaper in the long run. Let me know how it goes.
xoxo,
Cosette
Lauren Medlin says
Do you have instructions on how to just make the milk starter or rowbe?? I need it to make seefhas/fatayer/pathies (my husband's family calls it pathies, my family calls it seefhas, and I have also have heard them be referred to as fatayer)
Cosette's Kitchen says
Hi Lauren,
The milk start/rowbé is just plain yogurt, not Greek yogurt, not low-fat yogurt. Whole milk, plain yogurt. I like to use Danon if you can find it when making Labneh, it gives the best end result for that tangy Labneh flavor. Once you make your first batch, you will take a "start" from your own and continue that process as you continue to make it. Many times neighbors (in Lebanon or Lebanese communities) will borrow a "start" from a neighbor. Hope that makes sense! Here is my sfeeha recipe as well, feel free to sub ground beef in place of lamb.
https://cosetteskitchen.com/lamb-sfeeha
Xoxo,
Cosette
Erin says
Dying to make this, but I'm the only one who would it eat in my house. I'm worried I'd end up with more than I could eat. Does it freeze well? Or could you point me towards any recipes that I could use it in?
Cosette's Kitchen says
Hi Erin,
The texture of yogurt definitely changes after freezing. I would start with 1 gallon of milk. You can remove some yogurt to keep plain and that can be used in baked goods anytime yogurt is used. For the rest that is drained (Labneh) you can enjoy as is, I also love to add cooled down fruit or jams to make them flavored yogurts. Again, anywhere yogurt is called for you can use! Here are a few recipes that call for yogurt:
https://cosetteskitchen.com/lamb-sfeeha
https://cosetteskitchen.com/homemade-no-yeast-bread
https://cosetteskitchen.com/almond-orange-semolina-muffins
https://cosetteskitchen.com/recipe/grapefruitpoppybread
If you type yogurt in the search bar on my page a bunch of recipes show up! Hope that helps!
Xoxox,
Cosette
Cynthia says
I LOVE Labneh! I have memories doing this with my mom!! I recently tried it with her recipe, which never has measurements and actual steps haha. But would I be able to use lactose free milk to make my Labneh?
Cosette's Kitchen says
Yay!!! That is exactly how I got my recipe, no measurements or temperature 😆 That's how our parents did it. Hope this is helpful to you!
Xoxo,
Cosette
Sukaina says
Love this recipe! It’s so easy to follow and it always turns out perfect. I’ve made it three times, my family loves it. Thanks so much! 😍
Cosette's Kitchen says
Oh yay,that makes my day! So glad you love it!
Xoxo,
Cosette
Anita says
Can’t wait to try! I love your stories and your details. Thank you!
Cosette's Kitchen says
Hi Anita,
I'm so glad you are going to give it a try. Please let me know if you have any questions.
xoxo,
Cosette
LaRae says
Such a great recipe. I could eat labneh straight from the container!
Cosette's Kitchen says
Thanks darling! So glad you enjoy! I hope you try to make some 🙂
Xoxo
Cosette